Advanced Exercises & Progressions
Beyond the Big 3 — advanced stabilization exercises, labile surface training, and work-hardening protocols for those ready to push further.
When Are You Ready?
You're ready for advanced exercises when ALL of these are true:
- You can perform the Big 3 at 10-8-6 without any pain
- You've been walking 30+ minutes daily without symptoms for 4+ weeks
- Your daily activities are pain-free
- You haven't had a flare-up in 3+ weeks
- Your hip mobility allows full squat and lunge range pain-free
If any of these aren't met, stay with the Stage 2-3 program. Advanced exercises performed too early will set you back.
The most common mistake: feeling good for a week and jumping to advanced work. Feeling good means the program is working — not that you're done with it. Advanced exercises impose higher spinal loads. Your tissues must be ready.
Advanced Big 3 Progressions
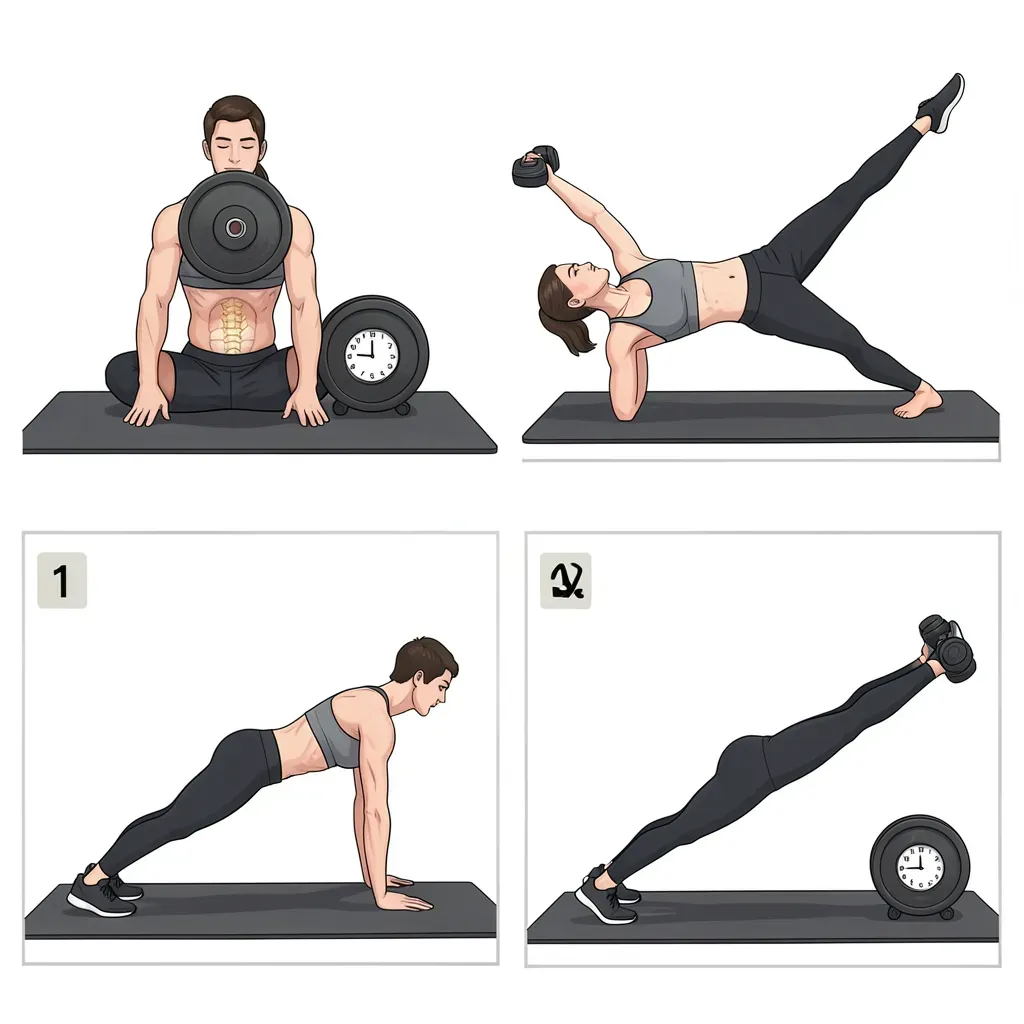
Curl-Up: Highest Level
- Standard curl-up position (one knee bent, hands under lumbar spine)
- Add load: hold a weight plate on your chest
- Lift head and shoulders with the same tiny range of motion
- The spine still does NOT move — you're resisting a greater flexion moment
Progression: Start with 2.5 kg plate, progress to 5 kg, then 10 kg. If your back arches off your hands at any point, the load is too heavy.
Side Bridge: Highest Level
- Full side bridge from feet
- Top arm extended overhead (longer lever = more demand)
- Top leg lifted and held in abduction
- Roll through front plank to opposite side in one fluid motion
Progression: Add holds in the transition (3 seconds in each position). Add repetitions slowly.
Bird-Dog: Highest Level
- Standard bird-dog position
- Add ankle weight to the extending leg (start with 1 kg)
- Add a small dumbbell in the extending hand (start with 1 kg)
- Perform the sweep (touch elbow to knee underneath) before each extension
- Hold extended position for 10 seconds with zero spinal movement
Progression: Increase weight in 0.5-1 kg increments. If the pelvis rotates or the spine sags, reduce weight.
Stir-the-Pot
One of the most effective advanced stabilization exercises, developed from research on core muscle activation patterns.
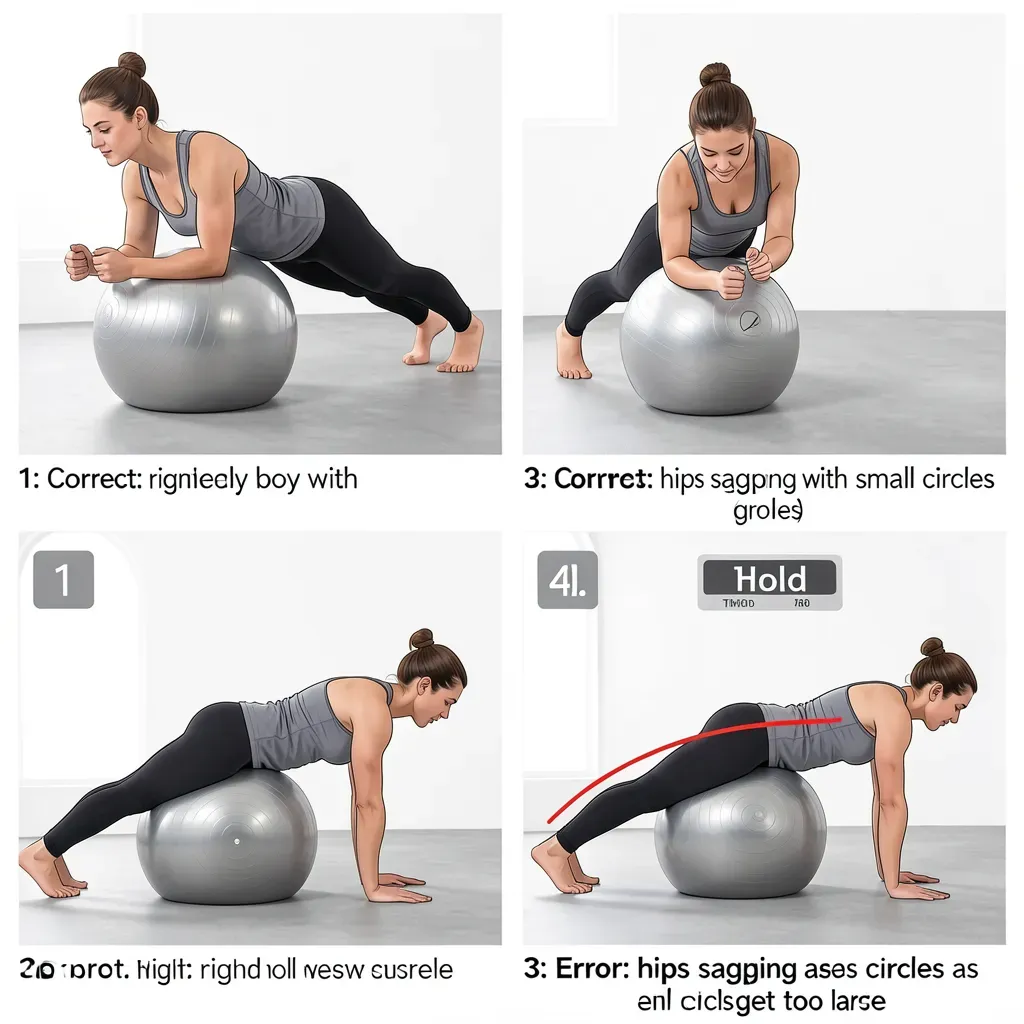
Setup
- Place your forearms on a Swiss ball (exercise ball)
- Feet on the floor, body in a plank position
- The ball should be directly under your shoulders
Execution
- Engage the full abdominal brace
- While maintaining a perfectly rigid spine, move your forearms in small circles on the ball
- The ball rolls in a small circular pattern — your core resists the destabilizing forces
- Perform 5 circles clockwise, then 5 counter-clockwise
- Rest. Repeat 3 sets.
Key Points
- The spine does NOT move. The motion is only in the shoulders/arms
- If your hips drop or pike upward, the ball is too far away or the circles are too large
- Start with tiny circles (10 cm diameter) and progress larger
- This exercise imposes high core activation with relatively low spinal compression
Stir-the-pot ranks among the highest core muscle activation exercises measured in the laboratory — higher than sit-ups, crunches, or even heavy lifting — but with much lower spinal compression. It's the best ratio of muscle challenge to joint load.
Labile Surface Training
Training on unstable surfaces (Swiss balls, BOSU balls, wobble boards) challenges the stabilizing system. But the research is nuanced:
When Labile Surfaces Help
- For training the reactive stabilization system (unexpected perturbations)
- For developing proprioception after injury
- For adding challenge without adding external load
- As part of a varied program (not the foundation)
When They Don't Help (and Can Harm)
- For strength development (you can't load enough on an unstable surface)
- As a replacement for the Big 3 (they don't target the same patterns)
- For acute pain patients (too much demand too early)
- For heavy resistance training (too dangerous)
Safe Labile Surface Exercises
Swiss Ball Plank Hold:
- Forearms on the ball, feet on floor
- Hold rigid plank position for 10-30 seconds
- Progression: narrow the foot stance, lift one foot
BOSU Ball Bird-Dog:
- Hands on BOSU ball (dome up), knees on floor
- Perform standard bird-dog
- The unstable surface adds rotational and lateral challenge
Standing on Wobble Board:
- Stand on wobble board with slight knee bend
- Maintain balance while performing upper body tasks (catching a ball, reaching)
- This trains reactive ankle and hip strategies that spare the spine during slips
Never perform heavy resistance training on an unstable surface. The spine compression is the same, but your ability to maintain neutral is compromised. This increases injury risk rather than building capacity. Reserve labile surfaces for bodyweight or very light load exercises.
Torsional (Anti-Rotation) Training
The spine pays an enormous compression cost for twisting torque. Anti-rotation exercises train the ability to RESIST rotation without the joint penalty of creating it.
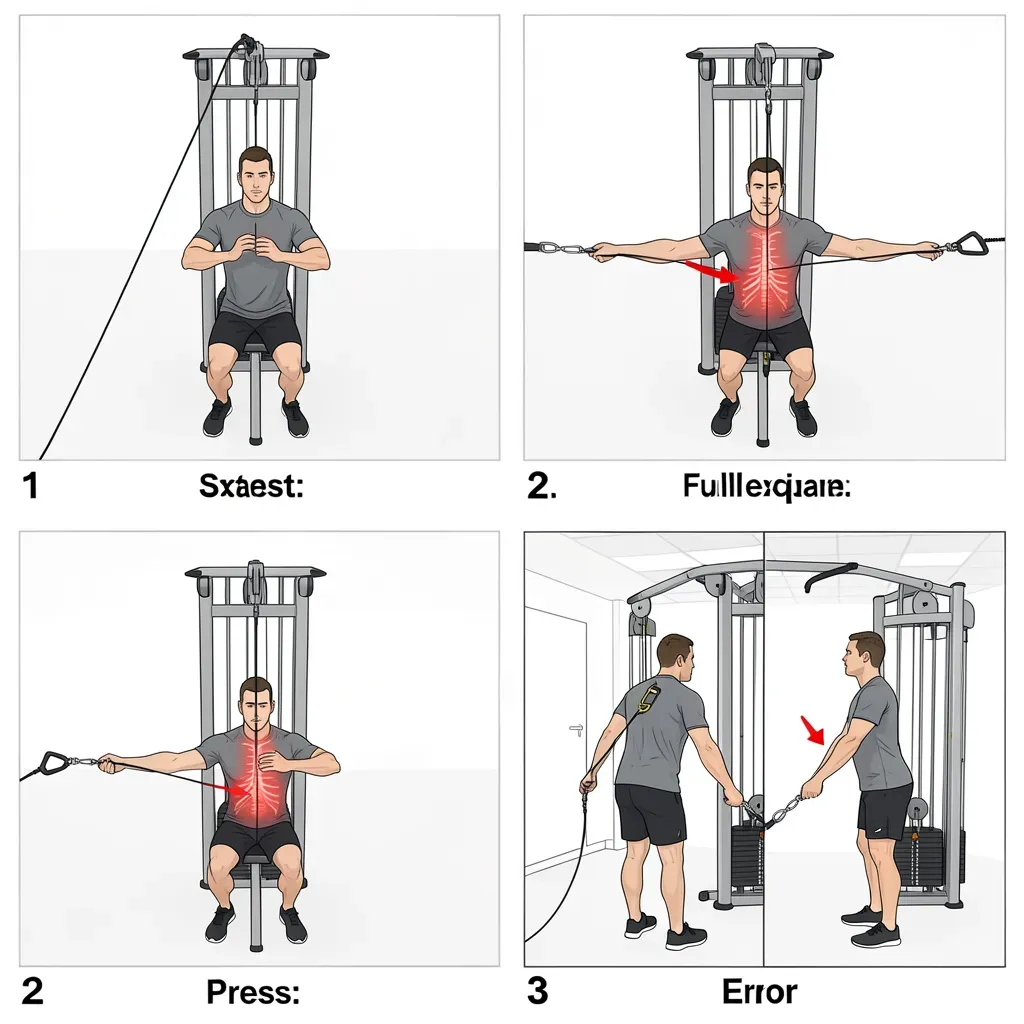
Pallof Press
- Stand sideways to a cable machine or anchored resistance band
- Hold the handle at chest height with both hands
- Press your arms straight out in front of you
- The band/cable tries to rotate you — your core resists
- Hold extended position for 5-10 seconds
- Return. Repeat 6-8 times each side.
Cable Chop (Anti-Rotation Version)
- Set cable high on one side
- Grip handle with both hands
- Pull diagonally across your body to the opposite hip
- The CRITICAL distinction: your hips and shoulders rotate (as a unit) while your SPINE stays locked
- The rotation occurs at the feet and hips, not the lumbar spine
- Perform 8-10 each direction
Plate Hold Walk
- Hold a weight plate extended at chest height in front of you
- Walk forward for 20-30 seconds
- The extended load challenges anti-flexion of the spine
- Progress by increasing plate weight or adding small perturbations (partner gently pushes)
Work Hardening: Occupational Preparation
For those returning to physically demanding jobs (construction, warehousing, farming, trades), sport-specific concepts apply to work-specific preparation.
Carry Progressions
| Level | Exercise | Duration | Load | |-------|----------|----------|------| | 1 | Two-hand farmer's walk | 30 sec | Light (10-15 kg total) | | 2 | One-hand suitcase carry | 30 sec | Moderate (8-12 kg) | | 3 | Front-rack carry | 30 sec | Moderate | | 4 | Overhead carry | 20 sec | Light (5-8 kg) | | 5 | Uneven farmer's walk | 30 sec | Different weights each hand | | 6 | Carry + obstacle | 30 sec | Navigate steps/turns |
Push/Pull Progressions
| Level | Exercise | Sets × Reps | |-------|----------|-------------| | 1 | Wall push-up | 3 × 15 | | 2 | Incline push-up | 3 × 12 | | 3 | Floor push-up | 3 × 10 | | 4 | Band pull-apart | 3 × 15 | | 5 | Inverted row | 3 × 10 | | 6 | Sled push/pull | 3 × 20 sec |
Simulation Training
Once you can handle the above comfortably:
- Practice the specific motions of your job with spine-sparing technique
- Start at 25% of job demands, progress 10-20% per week
- Add time pressure gradually (speed is the last variable to increase)
- Simulate a full shift at reduced intensity before returning
Work hardening should replicate the SPECIFIC demands of your job. A warehouse worker needs carry and lifting endurance. A tradesperson needs awkward-position stability. A nurse needs patient transfer mechanics. Design your program to match your actual work tasks.
Training for Challenged Breathing
Research identified that many back injuries occur when the breathing system conflicts with the stabilization system. Training to maintain stability during heavy breathing is advanced but essential.
The Protocol
- Perform Big 3 exercises while breathing is elevated
- Start by walking briskly for 2 minutes, then immediately perform bird-dog
- Progress to: 30 seconds of jumping jacks → immediately into side bridge
- The goal: maintain perfect form and bracing even when breathing is demanding
Why This Matters
- Most real-world injuries happen during physical activity (when breathing is elevated)
- The abdominal wall must simultaneously support breathing AND provide stability
- Unfit motor systems "choose" breathing over stability when challenged
- Training this dual demand makes the system robust under real-world conditions
Programming Guidelines
Frequency
- Advanced exercises: 3-4 times per week (not daily — recovery needed)
- Big 3: STILL daily (maintenance is non-negotiable)
- Walking: STILL daily
Volume
- Start with 1 set of each new exercise
- Add sets weekly (maximum 3 sets of any exercise)
- If next-day soreness occurs, you've done too much
Progression Rules
- Master bodyweight before adding external load
- Master stable surfaces before adding instability
- Master slow speeds before adding velocity
- Master bilateral (two-sided) before unilateral (one-sided)
- Always maintain the Big 3 as your foundation — advanced work is built ON it, not instead of it