Disc Herniation Recovery Protocol
A phase-by-phase rehabilitation plan for disc herniation — from acute pain to full function.
The Central Principle: Directional Preference
Not all disc herniations respond to the same movement strategy. The most important clinical concept in herniation rehabilitation is directional preference — the individual's specific direction of movement that reduces or centralizes symptoms.
The majority of lumbar disc herniations have an extension preference: moving into extension (backward bending) reduces leg pain and centralizes it toward the spine. This is the typical presentation addressed in this protocol.
A minority have a flexion preference — usually older patients with more degenerative changes rather than true nucleus-driven herniation. Your directional preference is determined by clinical testing, not by reading an article.
If performing any of the extension movements below consistently increases your leg pain or causes it to travel further down your leg (peripheralization), stop. You may have a flexion-preferring presentation or a different diagnosis. Work with a McKenzie-trained clinician to establish your actual directional preference before continuing.
Establishing Your Direction: The Press-Up Test
Perform this test before beginning any protocol:
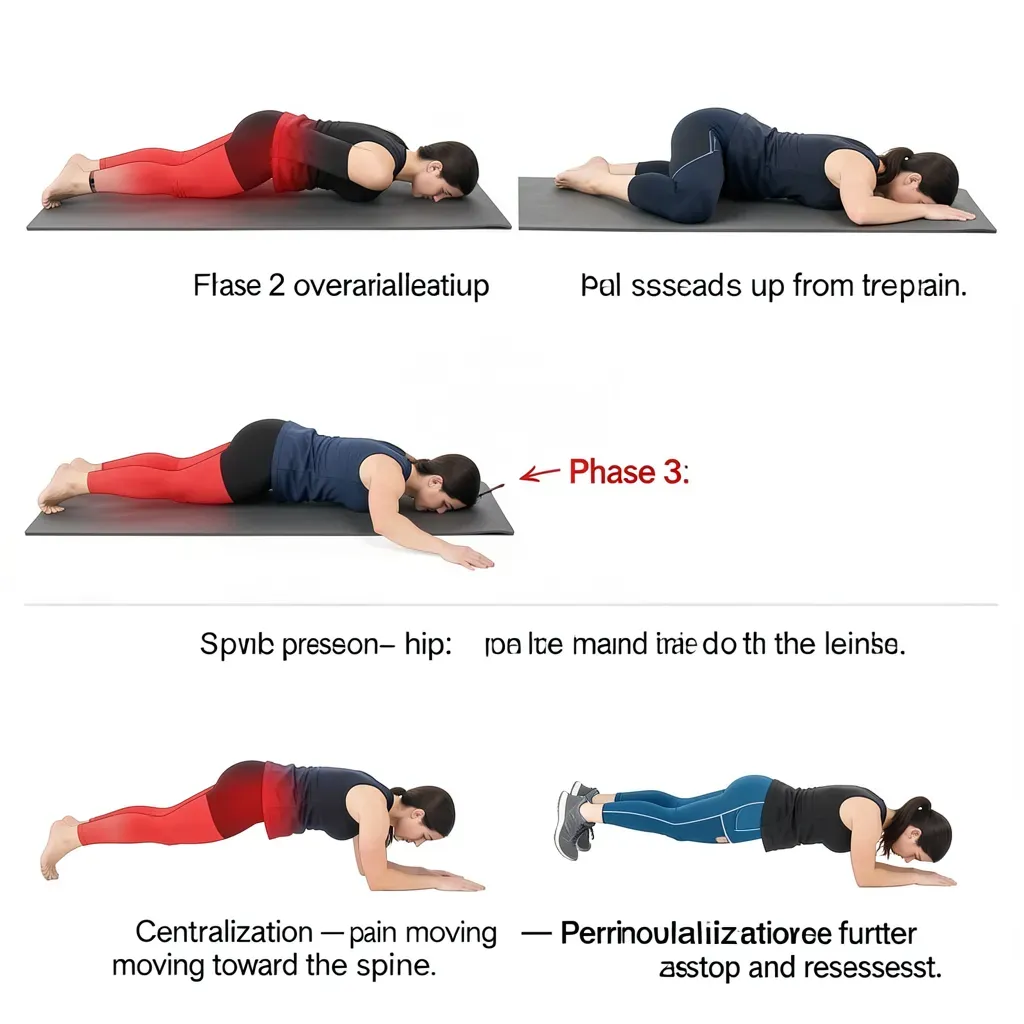
- Lie face-down on a firm surface. Remain here for 2 minutes. Note any change in leg pain location.
- Place your hands under your shoulders (push-up position). Press your upper body up while keeping your hips on the floor. Go to the point of stiffness — not pain. Hold 5 seconds. Return.
- Repeat 5 times. After the fifth repetition, lie flat and note any change in symptoms.
Centralizing response (proceed with extension protocol): Leg pain moves upward — from calf to thigh to buttock to low back. Back pain may temporarily increase. This is the correct direction.
Peripheralizing response (stop): Leg pain moves further down or intensifies. This is the wrong direction. Seek clinical assessment.
No change: The test is inconclusive. Start conservatively with prone lying only, then reassess after 48 hours.
Phase 1: Acute (Weeks 1–2)
What You're Doing
In the acute phase, your goal is exclusively damage control: stop the mechanical forces that caused the herniation, allow inflammation to begin settling, and use extension to encourage nuclear material to migrate away from the nerve root.
The Extension Progression
Step 1 — Prone lying: Simply lie face-down on a firm surface with arms at your sides. Allow the lumbar spine to settle into extension passively. Hold for 5-10 minutes. Do this every 1-2 hours during waking hours.
Many people experience immediate, dramatic leg pain relief with prone lying alone. This is the disc pressure redistributing — the nuclear material shifts anteriorly away from the posterior nerve.
Step 2 — Prone on elbows: Progress to resting on your forearms (sphinx position). This increases the extension angle. Hold 2-3 minutes. Transition between prone lying and this position throughout the day.
Step 3 — Press-up: Hands under shoulders, hips stay on the floor. Press up and hold 5-10 seconds. Return fully. Perform sets of 10 repetitions every 2-3 hours.
What to Strictly Avoid
- Sitting without lumbar support — sitting is the most compressive position for the posterior disc. If you must sit, use a lumbar roll to maintain the natural curve. Limit sitting to 20-minute blocks.
- Forward bending — every forward bend pumps nuclear material posteriorly. Eliminate this completely.
- Rotation under load — twisting compresses and shears the disc simultaneously. No reaching across the body with any meaningful weight.
- Knees-to-chest stretching — the reflexive impulse for most people with back pain. In herniation, this directly increases posterior disc pressure and may worsen nerve contact.
- Sitting without moving — sustained postures compress the disc continuously. Set a timer and reposition every 20 minutes.
Log your symptoms twice daily: the location of leg pain (calf, thigh, buttock, back only) and intensity from 1-10. If leg pain is centralizing (moving toward the spine) even while back pain temporarily increases, you're progressing. Centralization is the most reliable early predictor of good outcome.
Phase 2: Subacute (Weeks 2–6)
The Transition Point
You're ready to advance to Phase 2 when:
- Leg pain has centralized to the buttock or is absent
- You can perform a full press-up without pain during or after
- You can walk for 15-20 minutes without symptom increase
Extension Protocol Continues
Maintain the press-up routine at full range. This is not the time to stop — it's the time to consolidate the gains. The disc is still capable of re-herniating if you remove extension and return to flexion too soon.
Adding the Nerve Floss
Once acute radicular symptoms are settling, nerve flossing reduces adhesions that may have formed around the nerve root:
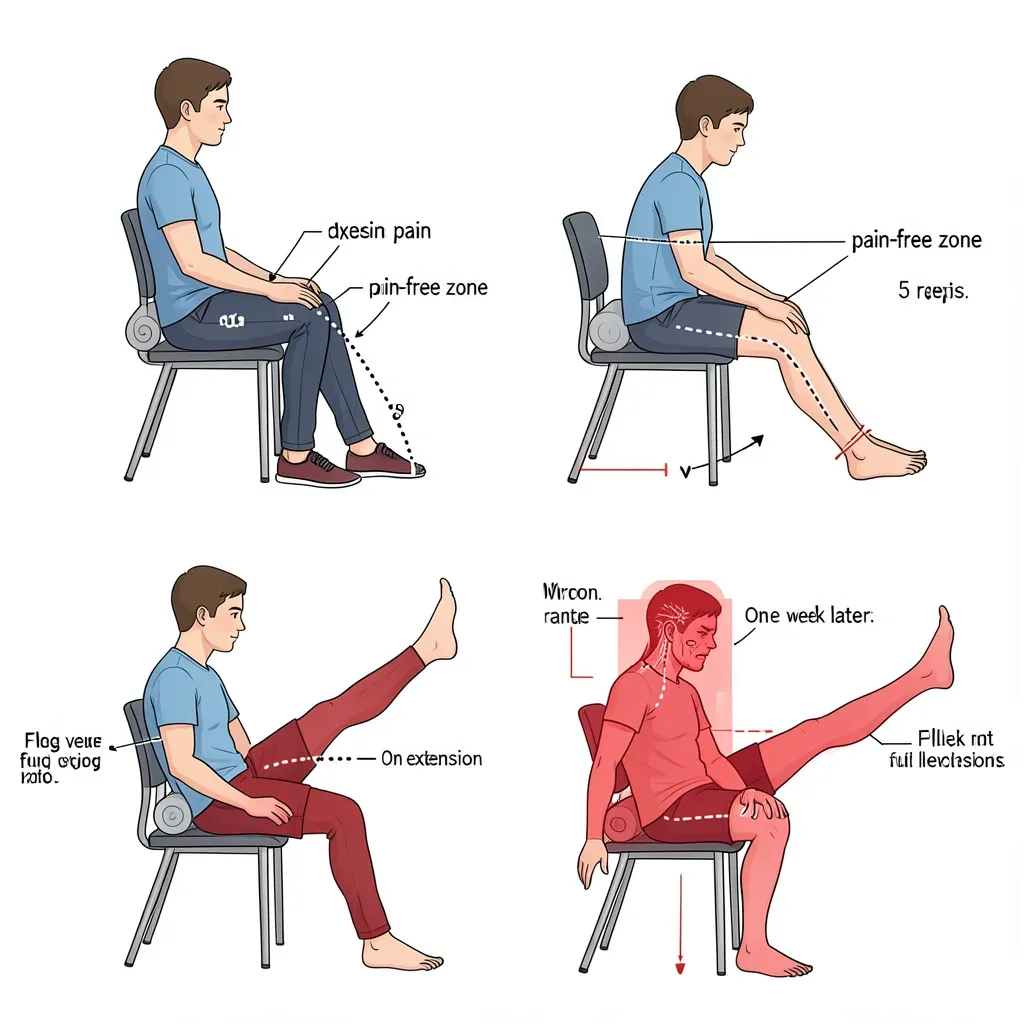
- Sit upright on a chair with good lumbar support
- Slowly extend the affected leg (straighten the knee)
- Stop well before pain — work only in the tension-free range
- Flex the ankle (toes toward shin) while the leg is extended
- Hold 3 seconds. Return. Perform 5 repetitions.
- Progress range over days as the pain-free range expands
The nerve floss is a gentle oscillation of the neural tissue — NOT a stretch into pain. Aggressive nerve tensioning in the acute phase worsens inflammation.
Introducing Walking
Walking is critical in Phase 2. The gait cycle naturally alternates spinal loading and unloading, promotes disc nutrition, and reduces inflammation via the pumping action of fluid movement.
Start with 10-15 minute walks and progress to 30 minutes daily by the end of week 6. Walk with deliberate posture — slight lumbar curve maintained, head level, arms swinging. No hunched shuffling.
Recognizing Your Progress Signals
Good signs:
- Leg pain retreating toward the spine (centralization)
- Reduced pin-and-needle sensations in the foot or calf
- Longer intervals before symptoms return during daily activity
- Able to walk further before symptoms emerge
- Press-up is easier and produces faster centralization
Caution signs — reduce load and reassess:
- Leg pain spreading further from the spine (peripheralization)
- New numbness in a region not previously affected
- Any change in bowel or bladder function (seek immediate care)
- Symptoms worsening consistently despite 1 week of strict protocol adherence
Phase 3: Rehabilitation (Months 2–6)
The Transition Point
You're ready for Phase 3 when:
- Leg pain is absent or minimal and no longer centralizing (because it's already centralized)
- You can perform daily activities without triggering symptoms
- Press-up is pain-free and full-range
Introducing the Big 3
Phase 3 is when the Big 3 exercises — curl-up, side bridge, and bird-dog — enter the program. These are detailed in Article 8. In the herniation context:
Curl-up: Begin at Stage 1 (lowest head position, hands under lumbar spine). Confirm the lumbar curve is maintained throughout. This is NOT a sit-up — the spine does not flex.
Side bridge: Start from the knees. The herniated disc has been mechanically stressed by flexion for weeks or months. Build lateral stability systematically before advancing.
Bird-dog: The highest priority exercise for disc herniation recovery. The contralateral arm-leg extension creates extension torque in the lumbar spine — exactly the direction that promotes recovery — while simultaneously training anti-rotation stability.
The Big 3 are not "core exercises" in the conventional sense. They are motor pattern training exercises. Their value is in reestablishing the correct spinal stability patterns that were disrupted by pain inhibition and avoidance behaviors during the acute phase. Perform them daily and with full attention to technique — not as a gym workout, but as neuromuscular practice.
Restoring Hip Mobility
Restricted hip mobility is both a contributor to disc herniation (when the spine compensates for stiff hips) and a consequence of the pain-avoidance behaviors that develop during recovery. Phase 3 includes deliberate hip mobility work — hip flexor stretching, hip rotation work, and the hip hinge pattern.
Do not attempt hip work that requires lumbar flexion. All hip stretching positions should maintain a neutral lumbar spine.
The McKenzie Approach in Context
The extension protocol described here is derived from the McKenzie Method (Mechanical Diagnosis and Therapy). McKenzie's contribution was systematizing the clinical assessment of directional preference and recognizing that the right direction of movement is therapeutic — not just pain-free.
A McKenzie-trained clinician can perform a formal assessment in two to three sessions that definitively establishes your direction and identifies any atypical presentations (cervical-referred, double-crush syndromes, non-mechanical pain) that require different management.
For the typical extension-preferring presentation, the self-directed protocol above is well-supported by research and appropriate to follow independently.
Weeks to Full Function: A Realistic Timeline
| Phase | Timeline | Goal | |-------|----------|------| | Acute | Weeks 1-2 | Centralization, pain control, stop damage | | Subacute | Weeks 2-6 | Consolidate centralization, walking, nerve floss | | Early rehab | Months 2-3 | Big 3, hip mobility, full walking program | | Late rehab | Months 3-6 | Progressive loading, activity return | | Full function | Month 6+ | Return to sport, lifting, unrestricted activity |
These timelines assume consistent protocol adherence and no re-injury events. A single week of flexion loading can return you to Phase 1. The reason most disc herniation recoveries extend beyond a year is not the disc — it's repeated mechanical re-injury during recovery.
In Review
- Directional preference — typically extension for lumbar disc herniation — is the organizing principle of rehabilitation
- The press-up test establishes direction; centralizing symptoms are the key progress indicator
- Phase 1 (weeks 1-2): prone lying, prone on elbows, press-ups every 2-3 hours; strict avoidance of flexion, rotation, and unsupported sitting
- Phase 2 (weeks 2-6): maintain extension protocol, add nerve floss for radicular symptoms, begin walking program
- Phase 3 (months 2-6): introduce Big 3 exercises, restore hip mobility, progressive loading
- Centralization (pain moving toward the spine) is good even if back pain temporarily increases; peripheralization means reassessment needed
- Full functional recovery typically takes 6 months with strict adherence; the disc itself typically shows significant resorption within 6-12 months