Postpartum Spine Recovery
Rebuilding core stability and spine function after birth — from the first week to returning to full activity.
What Has Actually Changed
Postpartum recovery is not "getting back to normal." It is rebuilding a fundamentally altered system. Before beginning any exercise, understand what has changed and why those changes matter biomechanically.
Diastasis recti. The two halves of the rectus abdominis (the "six-pack" muscle) separate along the linea alba during pregnancy as the uterus expands. This separation — called diastasis recti abdominis (DRA) — is normal and present in virtually all women by the third trimester. What varies is how much it narrows postpartum and how well the linea alba regains tension. The functional concern is not the gap width itself but the ability of the abdominal wall to transmit force across midline. A wide gap that transmits force adequately is less problematic than a narrow gap with a soft, unsupported midline.
Pelvic floor dysfunction. Vaginal delivery stretches the pelvic floor muscles and the pudendal nerve — sometimes significantly. Even cesarean delivery leaves the pelvic floor weakened from nine months of supporting the growing uterus. Symptoms include stress urinary incontinence (leaking with coughing, sneezing, or exercise), urgency, pelvic organ prolapse, and pain with activity. These are common — they are not normal in the sense of acceptable. They respond well to targeted rehabilitation.
Altered motor patterns. The core of a new mother has been operating under dramatically different loading conditions for nine months. The deep stabilizers — transversus abdominis, multifidus, pelvic floor — often show inhibited activation postpartum. Research using ultrasound imaging has confirmed that postpartum women demonstrate altered timing and magnitude of deep stabilizer engagement. This is the motor pattern issue that determines whether progressive loading is safe.
Hormonal laxity. Relaxin doesn't disappear at delivery. It remains elevated during breastfeeding. This means ligament laxity continues throughout the breastfeeding period — a fact that makes aggressive return to loading potentially problematic for months, not weeks.
The "bounce back" culture — the pressure to return to your pre-pregnancy body and fitness level as quickly as possible — is physiologically incompatible with safe recovery. A connective tissue system that is structurally altered and hormonally lax cannot be safely loaded on an aesthetic timeline. Rushing creates incontinence, prolapse, and injury. Building the foundation first creates a body that functions well for decades.
The 6-Week and 12-Week Milestones
The 6-week checkup is widely cited as medical clearance for exercise. This is a medical clearance in the narrowest sense — the uterus has involuted, the perineum is healed, major surgical sites are closed. It is NOT a clearance for jumping, running, heavy lifting, or high-impact activity. It means your tissues have survived the acute healing phase.
12 weeks is a more meaningful benchmark for progressive loading. By this point, most women have re-established baseline pelvic floor activation, incontinence (if present) is improving with targeted work, the DRA is narrowing, and the deep stabilizers are beginning to re-engage with consistency.
The phases below reflect this reality. They are not arbitrary — they align with tissue healing timelines and the motor learning curve required to rebuild safe movement patterns.
Phase 1 — Weeks 1 to 6: Establish the Foundation
The goal in this phase is not exercise. The goal is reconnection — re-establishing communication between the brain and the deep stabilizers that were disrupted by pregnancy and delivery.
Diaphragmatic Breathing
The diaphragm, pelvic floor, and deep abdominals function as a pressure management system. When the diaphragm descends during inhalation, the pelvic floor should descend slightly to accommodate the increased intra-abdominal pressure. On exhalation, both recoil upward. This coordination is the foundation for everything else.
Technique:
- Lie on your back with knees bent (supported position — this is still fine in Phase 1 for brief periods, or use a semi-reclined position)
- Place one hand on your chest, one on your lower abdomen
- Inhale through the nose — allow the lower abdomen to rise, the rib cage to expand laterally, the belly to soften
- Exhale slowly — notice the abdominal wall gently drawing inward, the pelvic floor lifting
- Ten breaths, twice daily
This isn't just breathing practice. It is re-activating the motor control loop between the respiratory system and the stabilization system.
Pelvic Floor Activation
Begin pelvic floor activation at 24-48 hours postpartum — even if there is soreness. Gentle muscle activation promotes circulation and reduces swelling. Do not wait for soreness to disappear before beginning.
Phase 1 pelvic floor work:
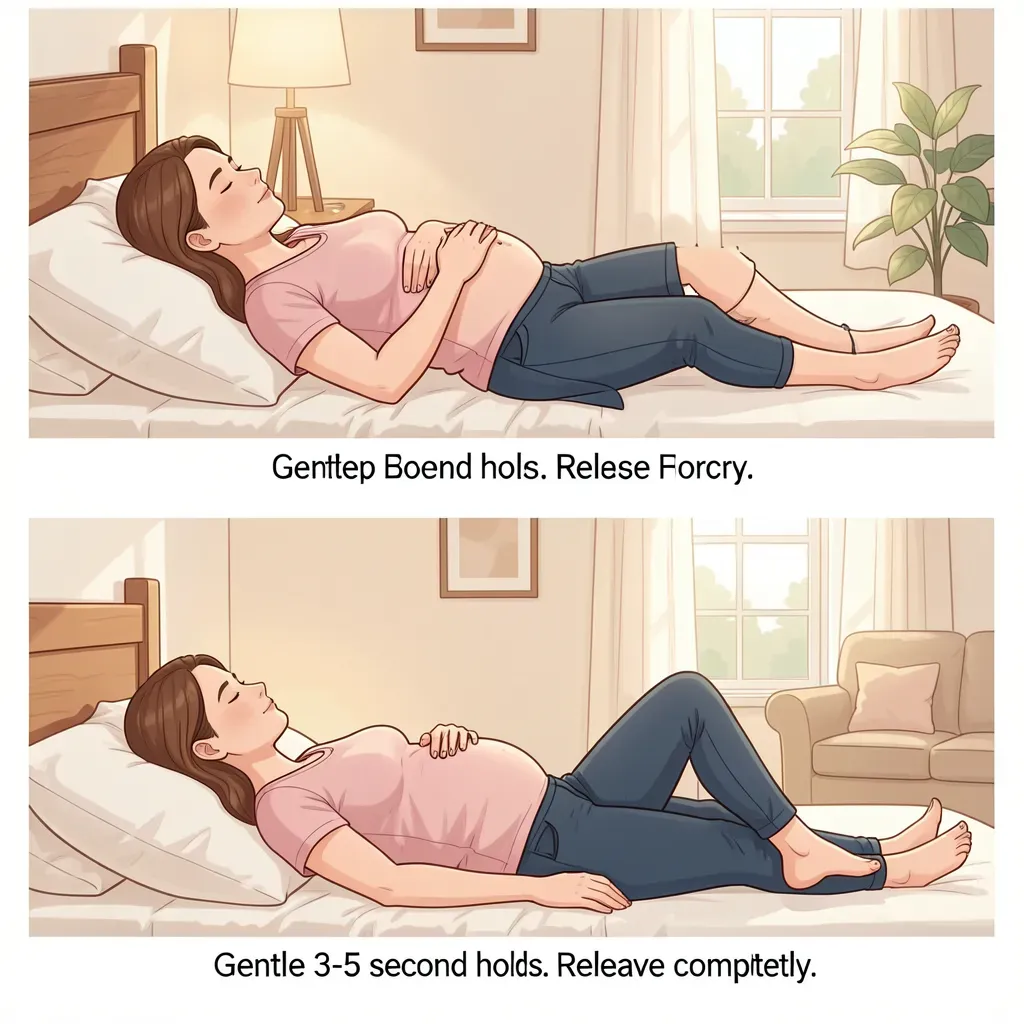
- Gentle 3-5 second holds, 10 repetitions, 2-3 times daily
- Equally important: the RELEASE. After each hold, completely let go. The ability to relax the pelvic floor fully is as important as the ability to contract it. Hypertonicity (a pelvic floor that can't relax) is a separate problem from weakness.
Walking
Begin short walks at 1-2 weeks postpartum (assuming an uncomplicated vaginal delivery; cesarean recovery follows physician guidance and typically begins shorter walks at week 2-3). Start with 5 minutes. Add 2-3 minutes per week. The walking program from earlier in this guide applies directly — this is the same controlled, progressive approach.
Walking is the most important exercise in Phase 1. It improves circulation, reduces DVT risk, promotes tissue healing, and begins rebuilding the spinal stabilization system that walking naturally activates.
If you notice increased lochia (bleeding) after activity, you have done too much. Rest for 24-48 hours, reduce the activity level, and rebuild more gradually. Increased bleeding is a direct feedback signal from your tissue that the pace is too aggressive.
Phase 2 — Weeks 6 to 12: Progressive Core Rehabilitation
Before beginning Phase 2, confirm:
- No stress urinary incontinence with light exercise (walking, stair climbing)
- Pelvic floor can activate and release on demand
- Walking 20+ minutes comfortably
- No pelvic or abdominal pain with daily activities
If any of these are not met, continue Phase 1 work and seek assessment from a pelvic floor physiotherapist before proceeding.
Diastasis Recti Assessment
Lie on your back with knees bent. Place two fingertips horizontally at the navel. Perform a small head lift (the modified curl-up movement). Feel for:
- Gap width: How many fingers fit between the two halves of the rectus muscle? (1-2 fingers is normal; 3+ warrants caution)
- Tension: Does the tissue under your fingers feel firm as you lift, or does it dome upward and feel soft/unsupported?
Tension is more important than gap width. A wide gap with firm tension is preferable to a narrow gap where the midline bulges or domes with exertion. Doming indicates the linea alba is transmitting load poorly and the exercise is currently too demanding.
If you observe doming (a ridge pushing outward along the midline during exertion), the exercise is exceeding your current abdominal wall capacity. Do not push through this. Regress to an easier variation until the midline can bear the load without doming. Doming is not dangerous, but it signals that you are training a compensation pattern rather than genuine stability.
Returning to the Big 3 — Modified for Phase 2
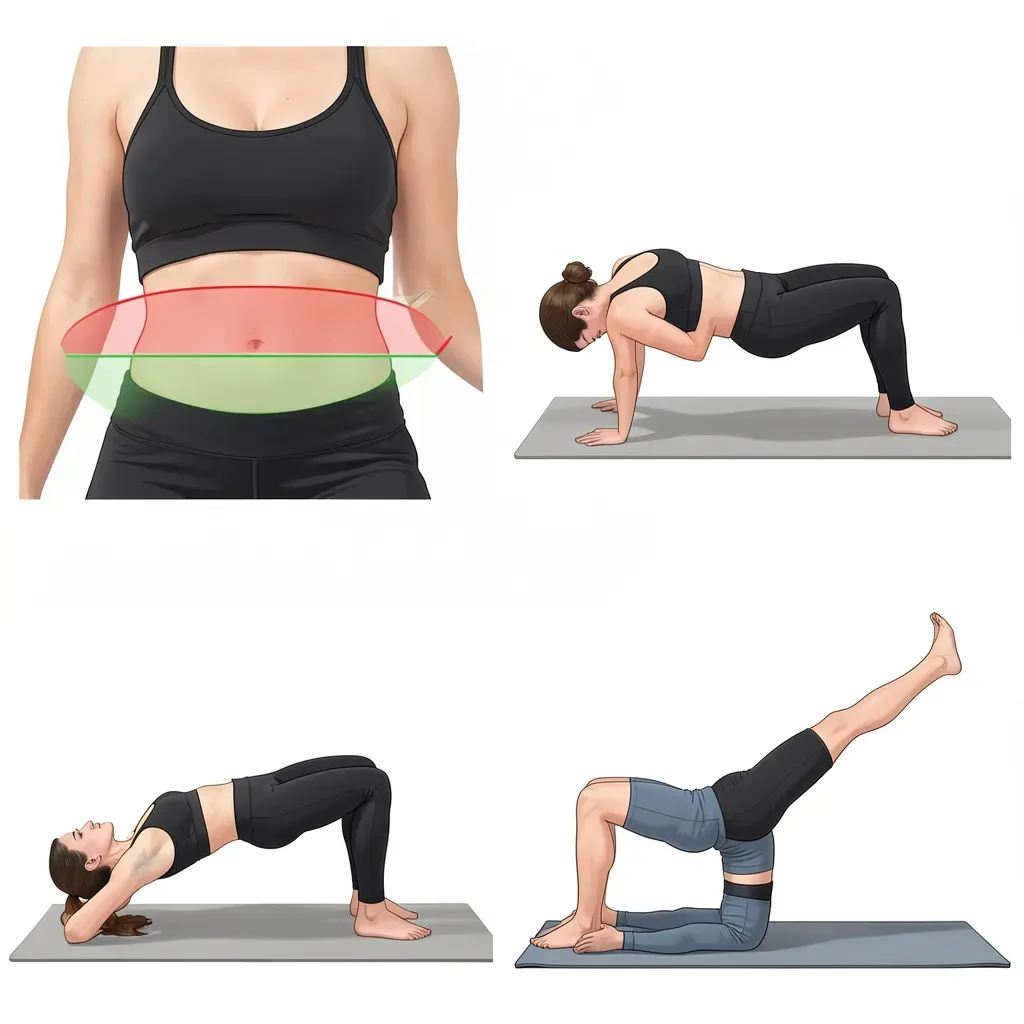
Modified curl-up: Begin with the standard setup. Check for midline doming with each rep. If doming is absent, proceed at the Phase 1 rep scheme (4-3-2 holds) before progressing. If doming occurs, substitute a head-nod exercise (lift only the head, leaving shoulders on the floor) until the capacity improves.
Side bridge from knees: This is the appropriate starting point for Phase 2. The lateral stabilizers respond well to this level and it avoids midline loading. Assess for any pelvic floor symptoms (leaking, heaviness) during holds — these indicate the pelvic floor is being challenged beyond its current capacity.
Bird-dog: Resume the standard bird-dog. Quadruped position is well-tolerated postpartum and provides excellent deep stabilizer activation. Watch for: any doming of the midline visible through clothing, and any pelvic floor symptoms during the hold. Neither should be present.
What to Avoid in Phase 2
- Full sit-ups and crunches. These create significant midline demand and commonly produce doming in women with DRA.
- Heavy lifting above approximately 10-12 kg. Load tolerance is rebuilding — don't jump-start it with maximally demanding lifts.
- Planks with poor pelvic floor control. A standard plank generates substantial intra-abdominal pressure. If the pelvic floor cannot manage this pressure, leaking or heaviness will occur. Begin with plank holds of 5-10 seconds only, monitoring symptoms.
- Running. The pelvic floor impact loading from running requires a level of pelvic floor capacity that is rarely established before 12 weeks. Beginning to run before this readiness leads to prolapse symptoms and incontinence.
Phase 3 — Three Months and Beyond: Return to Loading
Phase 3 begins when:
- Pelvic floor is symptom-free with Phase 2 exercises
- No doming with Phase 2 Big 3 variations
- Walking 30+ minutes without symptoms
- Has been assessed by a pelvic floor physiotherapist (strongly recommended before this phase)
Return to loading follows the same principles as any progressive rehabilitation: load only what can be done with a stable spine and a functional pelvic floor. If symptoms appear at any load level, that level is premature.
Progression sequence:
- Full side bridge (from feet)
- Standard plank holds (10-20 seconds, monitoring for symptoms)
- Goblet squats and hip hinge patterns (bodyweight, then light load)
- Return to walking-based cardiovascular conditioning at higher intensity
- Running — only after 12 weeks and only after pelvic floor has been specifically assessed for impact tolerance
Breastfeeding Posture
Breastfeeding sessions — which can total 5-8 hours per day in the early weeks — create sustained forward-flexed postures that load the cervical spine, upper back, and lumbar spine. This is a significant cumulative load.
Strategies:
- Use a nursing pillow to bring the baby up to breast height rather than hunching forward to the baby
- Support the lower back with a lumbar roll or small pillow
- Alternate the baby's position (football hold alternating with cradle hold)
- Sit against a backrest — avoid nursing while perched on the edge of a chair
- Every 2-3 nursing sessions, perform 5-10 standing thoracic extensions (hands on hips, gentle backward lean) to counteract the flexion
Relaxin remains elevated during breastfeeding, which means ligament laxity persists throughout the breastfeeding period. The timeline for returning to higher-load activities should be calculated from when breastfeeding ends, not just from the postpartum date. This is rarely communicated to new mothers and explains why some women continue experiencing hypermobility-related pain well into the first year.
Infant Lifting Mechanics
Lifting, carrying, and repositioning an infant occupies a large portion of the postpartum day. These are spine-loading tasks performed by someone with reduced stabilizer capacity and ligamentous laxity.
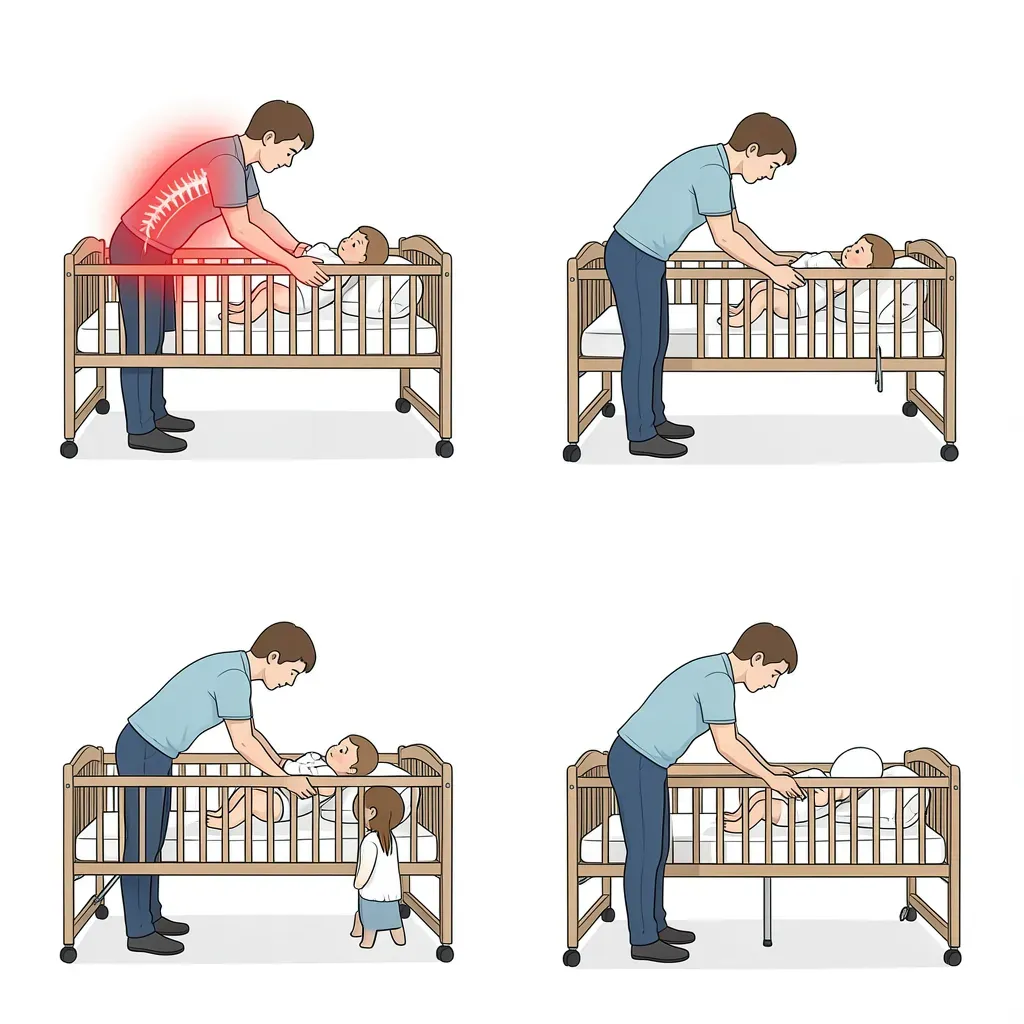
The spine-sparing infant lift:
- Bring the baby as close to your body as possible before lifting — extend your arms to the side of the cot, not over the rail
- Engage your brace before lifting
- Hinge at the hips, not the lumbar spine — think: push hips back, spine long
- Lift by driving the hips forward, not straightening the back upward
- When placing the baby down: lower in one controlled movement, don't hinge at the waist halfway through
Car seat use: Carrying an infant car seat at arm's length from the body generates extreme spinal loading (see the lever arm physics from the Workplace Spine Health guide — same physics, heavier consequence). Use the carry with the arm threaded through the handle and the seat resting against the body, or transfer the baby directly rather than carrying the full seat.
When to See a Pelvic Floor Physiotherapist
A pelvic floor physiotherapist should be consulted if:
- Any stress urinary incontinence (leaking with coughing, sneezing, exercise)
- A sensation of heaviness or pressure in the pelvic floor ("something falling out")
- Pain during intercourse at any point post-clearance
- Persistent pelvic or tailbone pain beyond 6 weeks
- Diastasis recti gap of 3+ fingers with poor midline tension
- Unable to feel pelvic floor activation after 4 weeks of consistent attempts
- You want to return to running, high-impact sport, or heavy lifting
In many countries, postpartum pelvic floor physiotherapy is standard of care. In others, you must self-refer. This assessment is not optional if you plan to return to any demanding physical activity — it is the clinical equivalent of getting a spine assessment before loading after a spinal injury.
The evidence strongly supports pelvic floor physiotherapy assessment for all postpartum women — not just those with symptoms. Subclinical dysfunction that isn't causing obvious problems at low activity levels will become obvious at higher loads. Finding and addressing it before it manifests as symptoms is far easier than addressing established dysfunction.
In Review
- Postpartum recovery addresses four biomechanical changes: diastasis recti, pelvic floor dysfunction, altered deep stabilizer motor patterns, and ongoing relaxin-related laxity (sustained through breastfeeding).
- The 6-week medical clearance marks the end of acute healing — it is not clearance for impact exercise, running, or heavy loading.
- Phase 1 (weeks 1-6) focuses on diaphragmatic breathing and pelvic floor reconnection, with progressive walking. The goal is reconnection, not fitness.
- Phase 2 (weeks 6-12) returns to modified Big 3 exercises. Midline doming during the curl-up or any pelvic floor symptoms are signals to regress, not push through.
- Diastasis recti assessment is based on midline tension, not gap width alone. Doming indicates excess load on the current system.
- Breastfeeding posture adds cumulative spinal load across many hours per day — nursing pillow height and thoracic mobility maintenance are practical interventions.
- Infant lifting follows the same lever-arm principles as any workplace lift: bring the load close, brace before lifting, hinge from the hips.
- Pelvic floor physiotherapy assessment is strongly recommended before returning to running, high-impact activity, or heavy loading — not only when symptoms are present.